Pages

Thursday, October 28, 2010

Mint Chocolate Frankenpops

I was really looking forward to making these with my kids.
I was all ready for them to get covered in sticky marshmallows and chocolate and have a blast doing it.
But of course, things never go according to plan.
They preferred to sit and watch, and didn't want to touch anything.
Maybe you will have more success than me.
(Even though I did have a lot of fun making these cute little Frankenstein monsters all by myself!)

Mint Chocolate Frankenpops
These would be great to have kids decorate at a Halloween party, or to hand out to friends, or to just make at home (like us).
They come together quiet quickly, and are pretty scrumptious.

Here's what you'll need:
- large marshmallows
- mint chocolate chips OR white chocolate, mint flavoring and green food coloring
- chocolate chips
- toffee bits
- sucker sticks

Here's how:
Start by melting your chocolate:

I used white chocolate, so I ended up adding a few drops of green food coloring and some mint extract.


Once your chocolate is melted, assemble everything else.
Make sure you have some sort of contraption that will allow your 'pops' to stand up straight.  I poked some holes in a paper bowl - it worked great.

Now, poke a sucker stick in the middle of a marshmallow:

Use a spoon or knife to 'frost' the chocolate over the marshmallow.  Make sure you get the outside and the top completely covered.

Now add your regular chocolate chips to the top - they remind me of little curls...

Take two chocolate chips and cut the tops off.
Use the flat portions as the eyes.

Then grab some toffee chips and stick those in for the teeth.

Continue decorating the rest of your marshmallows.

You can even dab a toothpick in the chocolate and make pupils for the eyes...

That is the perfect Halloween sucker if I do say so myself!

Have fun!

Wednesday, October 27, 2010

And the award goes to...

My cousin (in-law) was generous enough to offer me a Blog Award!
Wendy over at Recipe Cut Outs is one of the amazing women in my life, and probably the most sincere, caring person I've ever met.

So I'm honored to accept.  Surprised, but honored.
Thank you, Thank you.

Here's how the award works:

1. Accept the award. Post it on your blog with the name of the person who has granted the award and his or her blog link.

2. Pay it forward to 5 other bloggers that you have newly discovered.

3. Contact those blog owners and let them know they've been chosen.

There are a lot of blogs that I ABSOLUTELY LOVE, how to pick just 5?...
The first one that came to mind:

A place where moms team up together to discuss topics as we try to improve ourselves as mothers & wives.

Other blogs I find myself going to a lot:

I have no idea who this amazing woman is, but she is packed full of awesome ideas!

Yet another amazing woman with wonderful insights and educational activities.


and


Thanks ladies, for all of your inspiration!

Thursday, October 21, 2010

Paper Pumpkins, Napkin Ghosts and Egg Carton Arachnids

These are 3 really easy Halloween crafts that you can make with stuff you have lying around the house.
We did all three for a play group - it lasted about 1 1/2 - 2 hours with three kids.


Paper Pumpkins
I got this idea last year when Cannon brought this home from preschool:

I have a plethora of scrapbook paper but not 1 piece of construction paper, so we did ours a little differently.
I started with a cereal box so they would be more sturdy.

On each big piece of the box I drew a pumpkin.

Then Cannon and I cut off the edges.

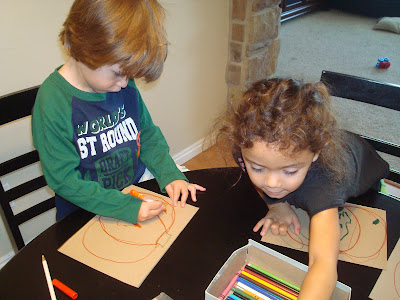
Each kid colored their pumpkins however they wanted.


Then I asked them what types of shapes they wanted for the eyes, nose and mouth.
They liked picking their own shapes and colors.
I used the flaps of the cereal box to make everything else.

Then they glued them onto their pumpkins.

Here's what we came up with:

Napkin Ghosts
I made these every Halloween as a kid.

Start by having the kids each unfold a napkin.


Give them each a plastic spoon, and 2-3 additional napkins.
Wad the napkins into a ball, and place it inside of the spoon.

Take the unfolded napkin and wrap it over the 'head' of the ghost.

Tie it off with a rubber band.

Now draw faces:


 The spoon gives them a handle so they can 'fly' their ghosts around, which they loved.

**  This would be even better if you used a lollipop instead of napkins and a spoon to make the head.  That way they could have a treat to go home with, but I didn't have any.  Next time...

And now for my personal favorite:

Egg Carton Arachnids
You will need to paint the cup portions of your egg carton black.  I didn't really feel up to letting 3 kids break out paint with only me supervising, so I spray painted before they got here.
 

Cut out individual cups (the corner pieces work best).
Now take 2 pieces of black pipe cleaner (per spider) and cut them in half.

Use a large quilting needle (or sharp pencil, etc.) to poke 4 holes in each side of the egg cup.
Start feeding your pipe cleaners through the holes.
 
  
 ** I actually found that it works much better to criss-cross the legs, rather than go straight across.

Now glue some google eyes into place.
 

Bend each leg out at the bottom to form the feet, and you're done.

Thursday, October 14, 2010

Instrument Classification 'Puzzle'

I was in charge of hosting our neighborhood Singing Time.
I made this to help the kids classify some popular musical instruments.
Instrument Classification Puzzle

Want to make your own?
 
Materials Needed:
 - Large posterboard
- Marker
- Instruments (I printed mine from the internet, using the same color of paper for each category)
- Cardstock

Start by cutting out all of your instruments.

I printed mine on heavy cardstock, and then glued them to another piece so they would be pretty sturdy.

Then divide your posterboard into however many sections you need.


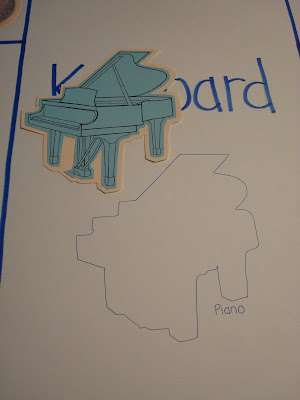
Label your categories:

Then trace around each instrument in its correct place.
I wrote the name of the instrument as well.


And you're done!