Pages

Showing posts with label Recycling. Show all posts

Wednesday, February 8, 2012

Egg Carton Glasses

Yet another quick craft idea!

 No explanation needed for this one!


Thursday, October 21, 2010

Paper Pumpkins, Napkin Ghosts and Egg Carton Arachnids

These are 3 really easy Halloween crafts that you can make with stuff you have lying around the house.
We did all three for a play group - it lasted about 1 1/2 - 2 hours with three kids.


Paper Pumpkins
I got this idea last year when Cannon brought this home from preschool:

I have a plethora of scrapbook paper but not 1 piece of construction paper, so we did ours a little differently.
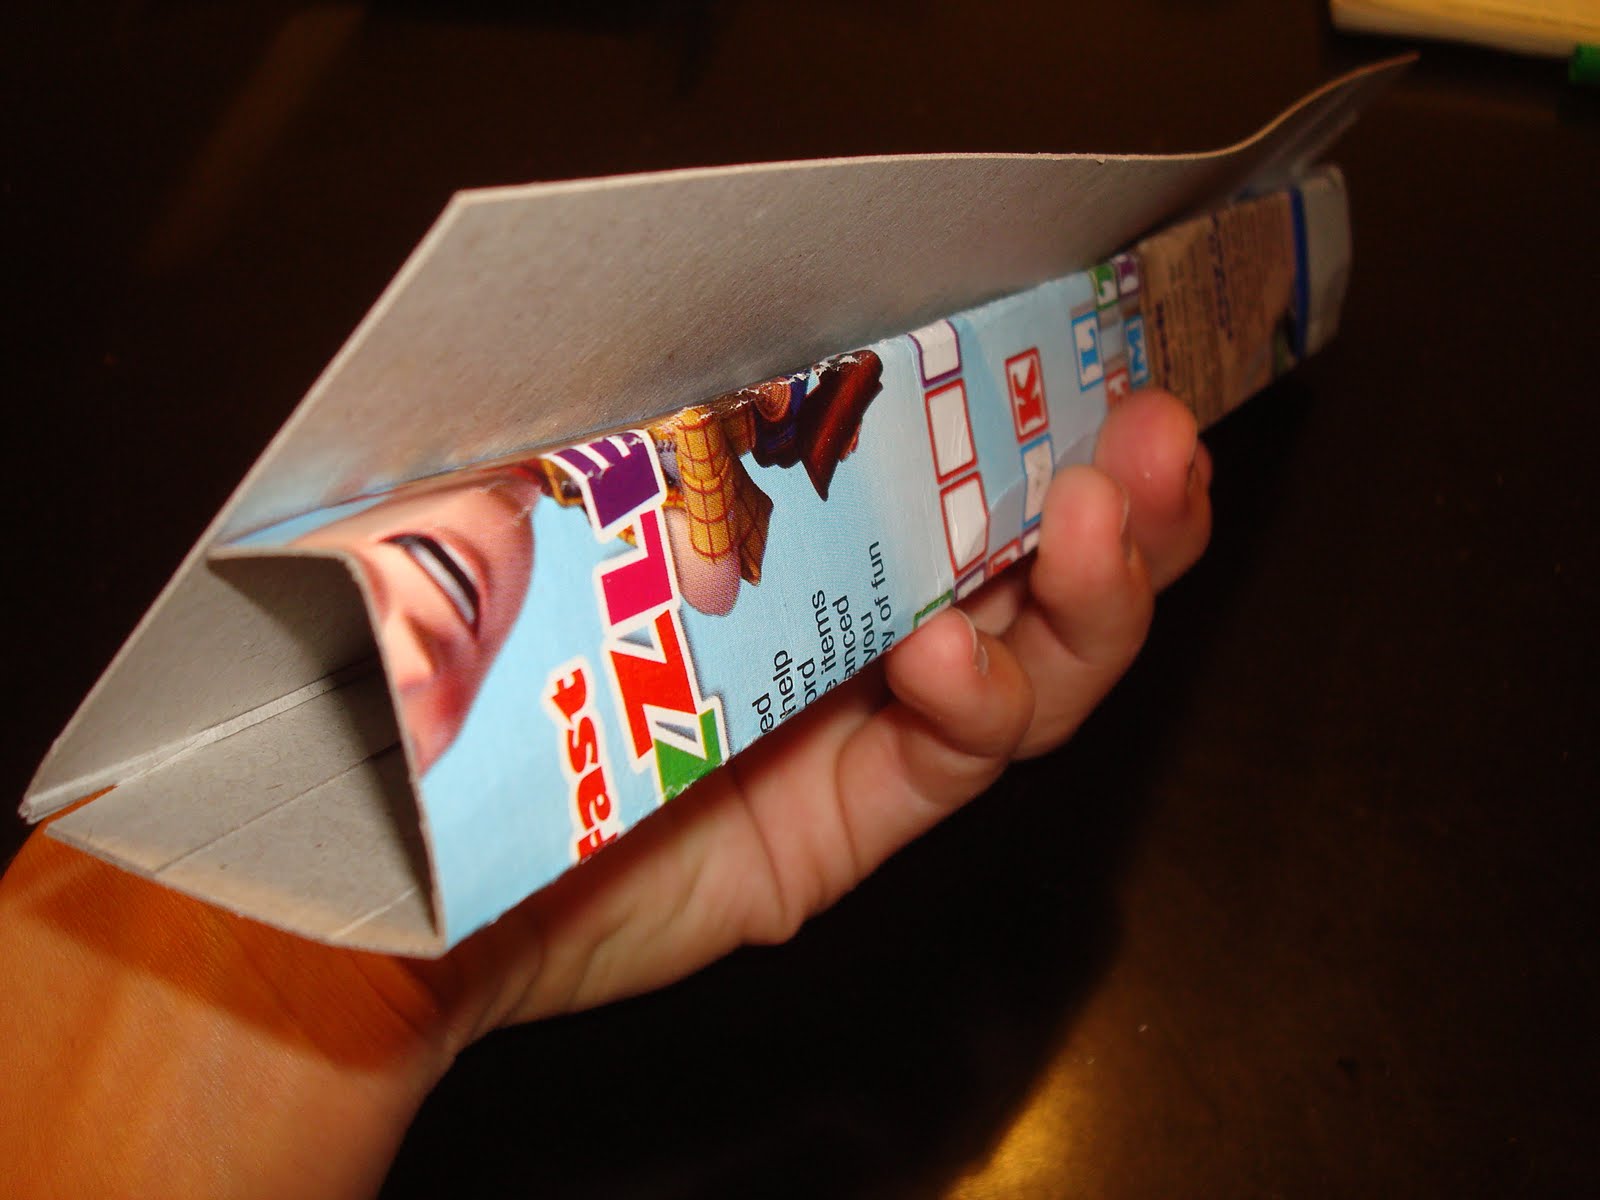
I started with a cereal box so they would be more sturdy.

On each big piece of the box I drew a pumpkin.

Then Cannon and I cut off the edges.

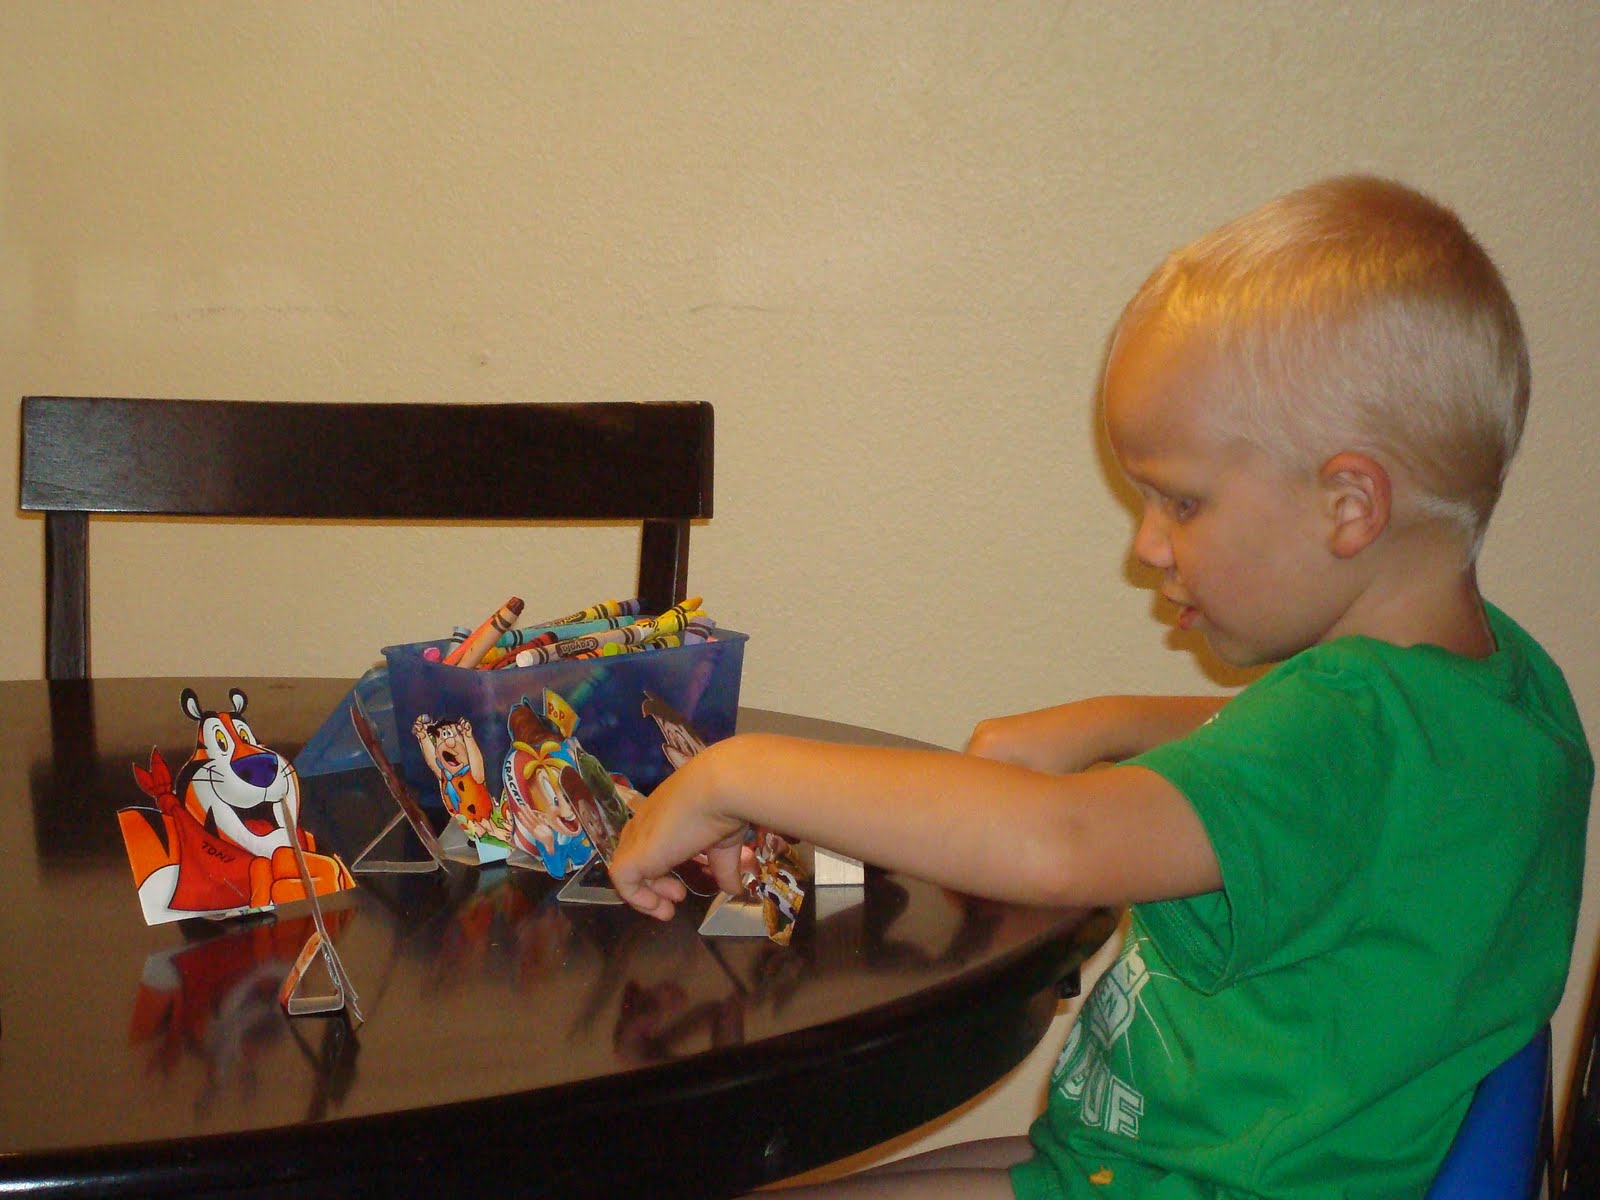
Each kid colored their pumpkins however they wanted.


Then I asked them what types of shapes they wanted for the eyes, nose and mouth.
They liked picking their own shapes and colors.
I used the flaps of the cereal box to make everything else.

Then they glued them onto their pumpkins.

Here's what we came up with:

Napkin Ghosts
I made these every Halloween as a kid.

Start by having the kids each unfold a napkin.


Give them each a plastic spoon, and 2-3 additional napkins.
Wad the napkins into a ball, and place it inside of the spoon.

Take the unfolded napkin and wrap it over the 'head' of the ghost.

Tie it off with a rubber band.

Now draw faces:


 The spoon gives them a handle so they can 'fly' their ghosts around, which they loved.

**  This would be even better if you used a lollipop instead of napkins and a spoon to make the head.  That way they could have a treat to go home with, but I didn't have any.  Next time...

And now for my personal favorite:

Egg Carton Arachnids
You will need to paint the cup portions of your egg carton black.  I didn't really feel up to letting 3 kids break out paint with only me supervising, so I spray painted before they got here.
 

Cut out individual cups (the corner pieces work best).
Now take 2 pieces of black pipe cleaner (per spider) and cut them in half.

Use a large quilting needle (or sharp pencil, etc.) to poke 4 holes in each side of the egg cup.
Start feeding your pipe cleaners through the holes.
 
  
 ** I actually found that it works much better to criss-cross the legs, rather than go straight across.

Now glue some google eyes into place.
 

Bend each leg out at the bottom to form the feet, and you're done.

Thursday, September 30, 2010

Milk Jug Catch

This is a really easy game that comes together quickly.
My boys loved it.

Milk Jug Catch

Materials Needed:
- Washed out Milk Jugs
- String or Yarn
- Scissors
- Squishy Balls

Start by cutting off the bottom half of your milk jugs.

Make sure the handle is still in tact.

Using your scissors, poke a hole just under the spout.
 Run your string through and tie a knot.

Then tie the othr end around your ball.

And you're done!


The idea is to swing the ball and catch it in the carton.
It is surprisingly hard for a 4 year old, so he cheats...


This has actually turned out to be a bigger success than I thought.  We don't go anywhere without his 'squishy ball' these days.

Have fun!

Thursday, September 9, 2010

Cereal Box Characters

Cannon has reached the point of make believe friends.
Mostly they consist of his Uncle McKell (who just left for 2 years), and "kids" as he calls them.
He plays with his fire truck saying things like "get out of the truck please Uncle McKell.  Thank you.  Okay kids, get in the truck."
It is very entertaining in and of itself, but I was throwing out some cereal boxes and noticed they had quiet a few characters on them.
I thought I'd provide Cannon with some alternates; to go along with the imaginary friends...

Cereal Box Characters

These came together really quickly.
First, cut out your characters:

Now you are going to make a 'stand' for each one.
Find part of the cereal box that has a bend in it:

Now you are going to make 2 more folds.
You want to make a triangle, but they are not going to be the same length.
Kind of hard to explain, so here are some pictures:

Once you have creased everything to make a triangle (with a little flap that folds underneath), lay it out flat again. 

Now you will cut individual strips out of it to use for each character:

Take the edge just under the smallest flap and secure it to the character (I used staples):

Now fold it up the way it was and secure the top (I used tape):

Now they should stand upright:

Now finish the rest:

And try not to be disapointed when all your kid wants to do is color over all of their faces:

Oh well, it kept him involved for long enough.

Enjoy!