Pages

Thursday, December 9, 2010

Yarn Octopus

I have a box in my office, and I try to keep it stacked with bagged activities in case I am ever in the need of something instantly.

Well, the other day Cannon asked to play with an octopus.
I didn't have one of those lying around.

But I did have the materials to make one in my handy little box:

Materials Needed:
- Yarn
- Ribbon (to tie around neck)
- Two small buttons (for the eyes)
- String (for the smile)
- small ball (ping-pong or golf ball size)

Step 1:
Cut 24 pieces of yarn into equal lengths (about 1 1/2 - 2 feet long)
Make them into a spider web.

 Wrap the middle section around your ball and tie the neck off with your ribbon:

Glue the eyes and mouth on.
You should have enough strings to make 8 braids (6 strands per braid).

I pretty much won the "awesome mom of the day award" for actually producing an octopus upon request.
It was pretty easy, too.

Thursday, December 2, 2010

Developmental Ages for Sound and Speech Development


http://communicationconnects.com/parent.htmHere are some helpful resources to let you know all about speech and language development pertaining to your young one(s).
This post will go over what sounds come first, what to expect by certain ages, as well as examples that will help you understand what kind of sounds and words they should be saying.

What Sounds Come First?
Written by Elaine L. Hicken, MS, CCC-SLP (2/96)

The first vocalizations a child makes are vowel-like sounds.  These are the easiest sounds to produce.

The respiration needed for speech is much different from quiet breathing.  Quiet breathing is easier than breathing for speech, because fewer muscles are required.  For speech, the diaphragm and muscles of the rib cage and between the ribs pull the ribs out and up to draw air into the lungs then the muscle of exhalation push the extra air that is needed for speech out of the lungs.  Respiration for speech develops as the child learns to push up with their arm, sit, crawl, stand, and walk.  Newborns breath from their "belly".  By about 12 months they primarily use chest breathing as they begin to stand and walk.

Consonant sounds are made by either stopping the air in the oral cavity (p, b, t, d, k, g) or letting it glide through restricted areas formed by using the lips, tongue, teeth, and palate (f, v, s, z, th).  Some consonant sounds require a stopping and a gliding action (j, ch).

There are three sounds that are made by forcing air through the nasal cavity and out the nose.  Air is prevented from coming out the mouth with the lips to form the /m/ sound.  The air is stopped with the tongue and palate to produce the /n/ sound.  The air is blocked in the back of the mouth with the base of the tongue and palate to form the /ing/ sound.

Some of the sounds used in English are voiced (vocal cords vibrate) and some are unvoiced (vocal cords remain open).  There are several consonant sounds that are made exactly the same way with the exception of voicing.  These are called pairs.  Some examples of pairs for consonant sounds include /p/ and /b/, /t/ and /d/, /d/ and /g/, /f/, and /v/, /th/ and /th/, /sh/ and /j/, /s/ and /z/.

Our brains have to program all of the necessary structures to preform simultaneously in order for a sound to be made correctly.  There are some sounds that are easier to make than others.  These sounds develop first, with the more complex sounds developing later.  It is not uncommon for a child to substitute an easier sounds for a more complex sound until he or she learns the correct sound.

This chart shows the sounds that should be mastered by the given ages.  If a child is not able to produce the sounds listed at his or her age level they may need some extra help.
A speech language pathologist may be contacted to offer help and suggestions.

Developmental Ages for Sound Development
(Utah Office of Education, Comminucation Disorders Guidelines, December 1991)

Speech Development: What to Expect

A toddler's mother is often the only person who understands much of what the toddler says.  The ability to correctly articulate the sounds in the English language develops at a varying rate in typical children.
The following describes the range of ages for mastery of consonant sounds.

Acquisition of Consonant Sound

This chart shows the average age estimates and upper age limits of customary consonant production.  The solid bar corresonding to each sound starts at the mediam age of customary articulation; it stops at an age level at which 90% of all children are customarily producing the sound.

(From Templin, 1957: Wellman et al., 1931.)
Source: Sander, Eric K. When Are Speech Sounds Learned?  JSHD, 37(1), 55-62, February 1972.

For more specific inquiries, try the following links:

LD Online: Speech & Language

Communication Connects

Thursday, November 18, 2010

Thankful For Turkey

This is an excellent idea that will help bring the 'spirit' of Thanksgiving to your house all month long (or however long you would like).

The idea is to put a picture of a turkey up on a wall in your home.  We put ours on the front door, so the boys would be reminded of it often.

You could draw your own, or just print one from the internet.


We colored our printed turkey, then we cut out several feathers, in coordinating colors.

Once a day, we would talk about things that we are grateful for.  We would then pick one blessing, and write it down on a feather.

We started at the beginning of the month, and had Cannon do one feather per day, but this could easily be done in a single day or over any amount of time.

This would also be a good Thanksgiving Day activity; especially if you were having a large group of people.  Everyone could have a feather and write down something that they were thankful for.

I think this is going to turn into an annual tradition at our house.  I am really enjoying it so far!

Thursday, November 11, 2010

Old Lady who Swallowed a Fly Puppet

Cannon's preschool class focuses on one book each month, and coordinates their activities around it.
They just finished There was an Old Lady who Swallowed a Fly.
The main concept they were teaching was size.

He came home with this puppet, and told me the story over and over (and over) again.
I was amazed at how well he had picked up the details.

I've included the story, if you don't have the book.
Either way it would be a fun craft to recreate at home, and a great way to teach small vs. big, big vs. bigger, etc.

I Know an Old Lady who Swallowed a Fly

They decorated paper bags by adding a head, cotton balls for hair, and tiny decorative balls for earrings (which were my favorite part).

On popsicle sticks they attached the individual animals:


You will need a fly, spider, bird, cat, dog, goat, cow and horse.


Like I said, it was easy to practice sizing them up...

 The little old lady's head was only secured to the front of the bag, so the animals could be eaten.

 He loved loved loved this!

I did some researching online, and found this website that has some printables if you want to make your own.
Here is the story, if that is all you need.

Enjoy!

Thursday, November 4, 2010

Motor Development

This is yet another handout I recieved from Kids on the Move.
It specifies the development of motor; what comes first, how old the average child should be doing what, etc.
I like checklists such as these so parents can determine where their child is, but more importantly what they can focus on to help further their development.

Motor Development
First Steps and Beyond

Standing Balance
Child will:
- Spend a lot of time standing and playing at a chest high surface
- Stand with back support (against a couch)
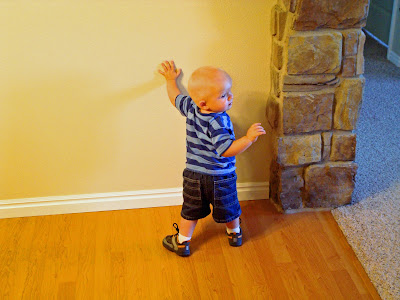
- Stand facing a flat surface (fridge, wall or cabinet) so trunk is not supported.
- Stand in the middle of the room holding onto a common toy.

Cruising (9-13 months)
Child will:
- cruise at different surfaces - starting with chest high

Encourage cruising by:
- moving a toy farther away, forcing them to move to it
- shift weight at their hips to encourage leg movement
- remember to help child to cruise in both directions

Cruising Gaps
Ecourage by:
- starting with furniture together or very close to build confidence
- increase gaps as able
- set up cruising opportunities if there aren't any already (use a kitchen chair, ottoman, etc).

Walking with Support (10-12 months)
- Once child can balance, hold hands at child's side (no higher than chest).

Encourage by:
- Progressing to one handed support by having child hold a toy (for a short distance).
- Push a push toy, weight it down if needed.
- Push a chair, laundry basket or box
- Walk with an object you hold (like a hoop)

Walking Unsupported (11-13 months) 
Child will:
- walk to a parent or couch and let go for the last 1-2 steps
- stand with back against the couch and then try to step forward from there
- may do better with or without shoes

Early Walking Tips (13-15 months)
 - walk on different surfaces (tile, carpet, grass, cement, sand, mattress)
- walk between surfaces; if indoor use blankets, pillows, cushions, etc.
- walk wearing big shoes

Early Walking
 - walk up or down small inclines or curbs
- carry light toys or pull toys on a string

Standing from the Ground Without Support (12-15 months)
 Child will:
- get onto hands and feet and push up into standing
- more mature pattern is to go into a half kneel and push from the floor to stand

Encourage by:
- putting their hands on a slightly higher surface like a cushion, box or bench

Backwards and Sideways Walking (14-15 months)
Encourage by:
- playing "Ring around the Rosie" to walk sideways
- pull a toy on a string to walk backwards
- walk backwards away from getting tickled
- rearrange furniture so that you have to walk sideways to get through
- you push a box while child pulls and walks backwards

Rapid Walking/Running (14-18 months)
Encourage by:
- holding childs hand and pulling him to encourage a faster walk
- play chase
- "run" down a small incline (this encourages a rapid walk)

Walking Upstairs With One Hand Held (17-19 months)
 Encourage by:
- trying to step up onto a small curb, box or stool
- showing them how to hold onto a rail or wall
- not always holding the same side

Alternating feet is not important at this stage.
Kids may lead with the opposite leg of the hand you are holding onto.

Walking Upstairs Alone (24-25 months) and Alternating Feet (30-34 months)
Encourage by:
- starting with a curb or small step stool to practice stepping up unsupported and build strength
- to alternate feet start with physical support and a lot of verbal cues
- put red and green stickers on each foot and match them to red and green cut outs you put on the stairs
Walking Downstairs with a Rail (24-26 months) and Alone (25-27 months)
Encourage by:
- starting with a curb, a few stairs or a child size stair case
- you can stand in front and hold one or both hands, remember not to show a worried face
- place childs hand on the wall so that they use it for support

Kicking a Ball (18-24 months)
- start with a large lightweight ball like a beach ball
- start by walking into a ball and then encourage kicking when standing still
- remember to use both feet

Running "Fairly Well" (18-24 months)
- arms should swing in alternate pattern with legs
- both feet are leaving the ground
- pull holding onto a hand to encourage a faster pace or chase

Climbing Onto an Adult Chair (18-21 months)
- a couch is the easiest, then a chair with arms, then a kitchen chair
- you can start by stepping onto a slightly higher surface like a bench or box or taking a cushion off
- help them raise one leg up, then hold it there

 Picking Up a Toy from the Floor (19-24 months)
 - start with picking up a toy from a slightly higher surface (cushion, bench, box or your hand)
- make sure the child is bending his knees to sqaut

Jumping in Place (22-30 months)
Encourage by:
- bouncing to music and encourage knee bending
- jumping on a trampoline, a mattress while holding onto the headboard, the crib holding onto a rail, or the sofa holding onto the back
- wait for child to initiate the jump and then help so that feet leave the ground

Jumping
 - jump to pop bubbles, bubble wrap, or jump into or out of a hoop
- jump off of a small step, curb or box; hold hands and help both feet leave the ground if the child is stepping down
- watch "tigger" videos, sing jumping songs

Standing on Tiptoes (23-25 months) and Walking on Tiptoes (25-30 months)
Child will:
- reach up for a toy on the counter, a picture on a wall or a ball you are holding

Encourage by:
- holding hands and pulling up to encourage getting onto tiptoes
- pretend games - tiptoe past the sleeping dolls, pretend to "grow"

Walking with More Mature Gait (23-30 months)
- walk between lines that are drawn or taped on the ground (they should get as narrow as 8" apart)
- walk on a plank of wood
- walk along a long piece of toilet paper

Catching a Ball (24-26 months)
- blow bubbles and have child try and "catch" or pop those that are blown towards them (start in sitting position so balance is not an issue)
- encourage child to trap ball against body
- catch a large balloon, light beah ball or gurdy ball
- start closely placing the ball in childs hand and then move further back

Running with Control (24-30 months)
- play chase around a large obstacle in the room (chair, trash can or a tree outside)
- gradually decrease the size of the obstacle to the size of a book, increase the number of obstacles
- play "red light, green light" to stop quickly

Balancing on One Foot Briefly (24-30 months) and for 5 Seconds (30-36 months)
- stomp on bubbles or bubble wrap
- stand to put on an adult's shoe without assistance or while getting dressed
- play "Simon Says"
- kick a ball
- walk up stairs with support
- put a ladder on the floor and step over the rungs
- try to lift up a bean bag that is placed on the foot

Riding a Tricycle (32-36 months)
- find a trike that allows the child's feet to reach the pedals and has a long lever arm
- strap in feet if they do not stay on the pedals
- push the trike with feet on the pedals so that child feels how the pedals move, start on a small incline

General Motor Planning
- encourage playing in new ways so that the child has to problem solve to do the task (go to a park)
- climb over small obstacles (like the ledge into the ball pit) or onto something unstable (platform swing)
- use play equipment for combining activities like crawling in tunnels, climbing, sliding and jumping

Red Flags - When to Consult with a Physical Therapist
- neglect of one side of the body - strong favoring of one arm or leg or leading with one leg
- not pulling to stand by 11 months or walking by 17 months
- can't stand without furniture 1-2 months after walking
- up on toes more than 50% of the time
- severe in-toeing or out-toeing that doesn't correct with time
- severely "flat" feet (pronated)
- clumsiness is so severe that it effects function

Thursday, October 28, 2010

Mint Chocolate Frankenpops

I was really looking forward to making these with my kids.
I was all ready for them to get covered in sticky marshmallows and chocolate and have a blast doing it.
But of course, things never go according to plan.
They preferred to sit and watch, and didn't want to touch anything.
Maybe you will have more success than me.
(Even though I did have a lot of fun making these cute little Frankenstein monsters all by myself!)

Mint Chocolate Frankenpops
These would be great to have kids decorate at a Halloween party, or to hand out to friends, or to just make at home (like us).
They come together quiet quickly, and are pretty scrumptious.

Here's what you'll need:
- large marshmallows
- mint chocolate chips OR white chocolate, mint flavoring and green food coloring
- chocolate chips
- toffee bits
- sucker sticks

Here's how:
Start by melting your chocolate:

I used white chocolate, so I ended up adding a few drops of green food coloring and some mint extract.


Once your chocolate is melted, assemble everything else.
Make sure you have some sort of contraption that will allow your 'pops' to stand up straight.  I poked some holes in a paper bowl - it worked great.

Now, poke a sucker stick in the middle of a marshmallow:

Use a spoon or knife to 'frost' the chocolate over the marshmallow.  Make sure you get the outside and the top completely covered.

Now add your regular chocolate chips to the top - they remind me of little curls...

Take two chocolate chips and cut the tops off.
Use the flat portions as the eyes.

Then grab some toffee chips and stick those in for the teeth.

Continue decorating the rest of your marshmallows.

You can even dab a toothpick in the chocolate and make pupils for the eyes...

That is the perfect Halloween sucker if I do say so myself!

Have fun!

Wednesday, October 27, 2010

And the award goes to...

My cousin (in-law) was generous enough to offer me a Blog Award!
Wendy over at Recipe Cut Outs is one of the amazing women in my life, and probably the most sincere, caring person I've ever met.

So I'm honored to accept.  Surprised, but honored.
Thank you, Thank you.

Here's how the award works:

1. Accept the award. Post it on your blog with the name of the person who has granted the award and his or her blog link.

2. Pay it forward to 5 other bloggers that you have newly discovered.

3. Contact those blog owners and let them know they've been chosen.

There are a lot of blogs that I ABSOLUTELY LOVE, how to pick just 5?...
The first one that came to mind:

A place where moms team up together to discuss topics as we try to improve ourselves as mothers & wives.

Other blogs I find myself going to a lot:

I have no idea who this amazing woman is, but she is packed full of awesome ideas!

Yet another amazing woman with wonderful insights and educational activities.


and


Thanks ladies, for all of your inspiration!

Thursday, October 21, 2010

Paper Pumpkins, Napkin Ghosts and Egg Carton Arachnids

These are 3 really easy Halloween crafts that you can make with stuff you have lying around the house.
We did all three for a play group - it lasted about 1 1/2 - 2 hours with three kids.


Paper Pumpkins
I got this idea last year when Cannon brought this home from preschool:

I have a plethora of scrapbook paper but not 1 piece of construction paper, so we did ours a little differently.
I started with a cereal box so they would be more sturdy.

On each big piece of the box I drew a pumpkin.

Then Cannon and I cut off the edges.

Each kid colored their pumpkins however they wanted.


Then I asked them what types of shapes they wanted for the eyes, nose and mouth.
They liked picking their own shapes and colors.
I used the flaps of the cereal box to make everything else.

Then they glued them onto their pumpkins.

Here's what we came up with:

Napkin Ghosts
I made these every Halloween as a kid.

Start by having the kids each unfold a napkin.


Give them each a plastic spoon, and 2-3 additional napkins.
Wad the napkins into a ball, and place it inside of the spoon.

Take the unfolded napkin and wrap it over the 'head' of the ghost.

Tie it off with a rubber band.

Now draw faces:


 The spoon gives them a handle so they can 'fly' their ghosts around, which they loved.

**  This would be even better if you used a lollipop instead of napkins and a spoon to make the head.  That way they could have a treat to go home with, but I didn't have any.  Next time...

And now for my personal favorite:

Egg Carton Arachnids
You will need to paint the cup portions of your egg carton black.  I didn't really feel up to letting 3 kids break out paint with only me supervising, so I spray painted before they got here.
 

Cut out individual cups (the corner pieces work best).
Now take 2 pieces of black pipe cleaner (per spider) and cut them in half.

Use a large quilting needle (or sharp pencil, etc.) to poke 4 holes in each side of the egg cup.
Start feeding your pipe cleaners through the holes.
 
  
 ** I actually found that it works much better to criss-cross the legs, rather than go straight across.

Now glue some google eyes into place.
 

Bend each leg out at the bottom to form the feet, and you're done.